Showing posts with label Felt. Show all posts

Tuesday, 20 March 2012

Felt needle case

This is how to make the needle case I made for my first craft swap with Popular Crafts magazine. You can read more about what I sent for the swap and what I received here!

Step 1

Cut out a template for the main part of your needle case. I made mine about 18cm by 10cm but you can do whatever size you want.


Step 2

Cut out 2 bits of felt using your template. I used contrasting colours. I also decided to round the edges but I didn't take a picture of that!


Step 3

I wanted to add a little pocket on the inside. To do this cut a little rectangle of felt. Stitch the pocket to the inside piece of felt only! It’s important to do this before sewing the front and back together as it hides the stitches.


Step 4

Create what you want to go on top. I made an owl for mine as the theme for the swap was owls!


Step 5

Stitch your owl (or whatever you've made) to the outside piece of felt. I also added to little buttons that you can see just peeking in on the edge of the photo!


Step 6

Cut a smaller piece of felt to make your page to put your needles and pins on. Stitch to the middle of the inside piece of felt.


Step 7

Once all the inside and outside decorations and pages have been secured sew the inside and outside felt together using a blanket stitch.


Step 8

Add your needles, pins and buttons! (As you can see I also decided to add a couple of buttons to the front)!


Tuesday, 13 March 2012

Popular Crafts February craft swap - Hearts!

I enjoyed doing the January craft swap organised by Popular Crafts magazine so much I signed myself up for the February one and March one too! No doubt when the next one comes around I'll be signing up for that too!

My swap partner was LeeAnn who has a lovely blog over at Polkadotsweetheart

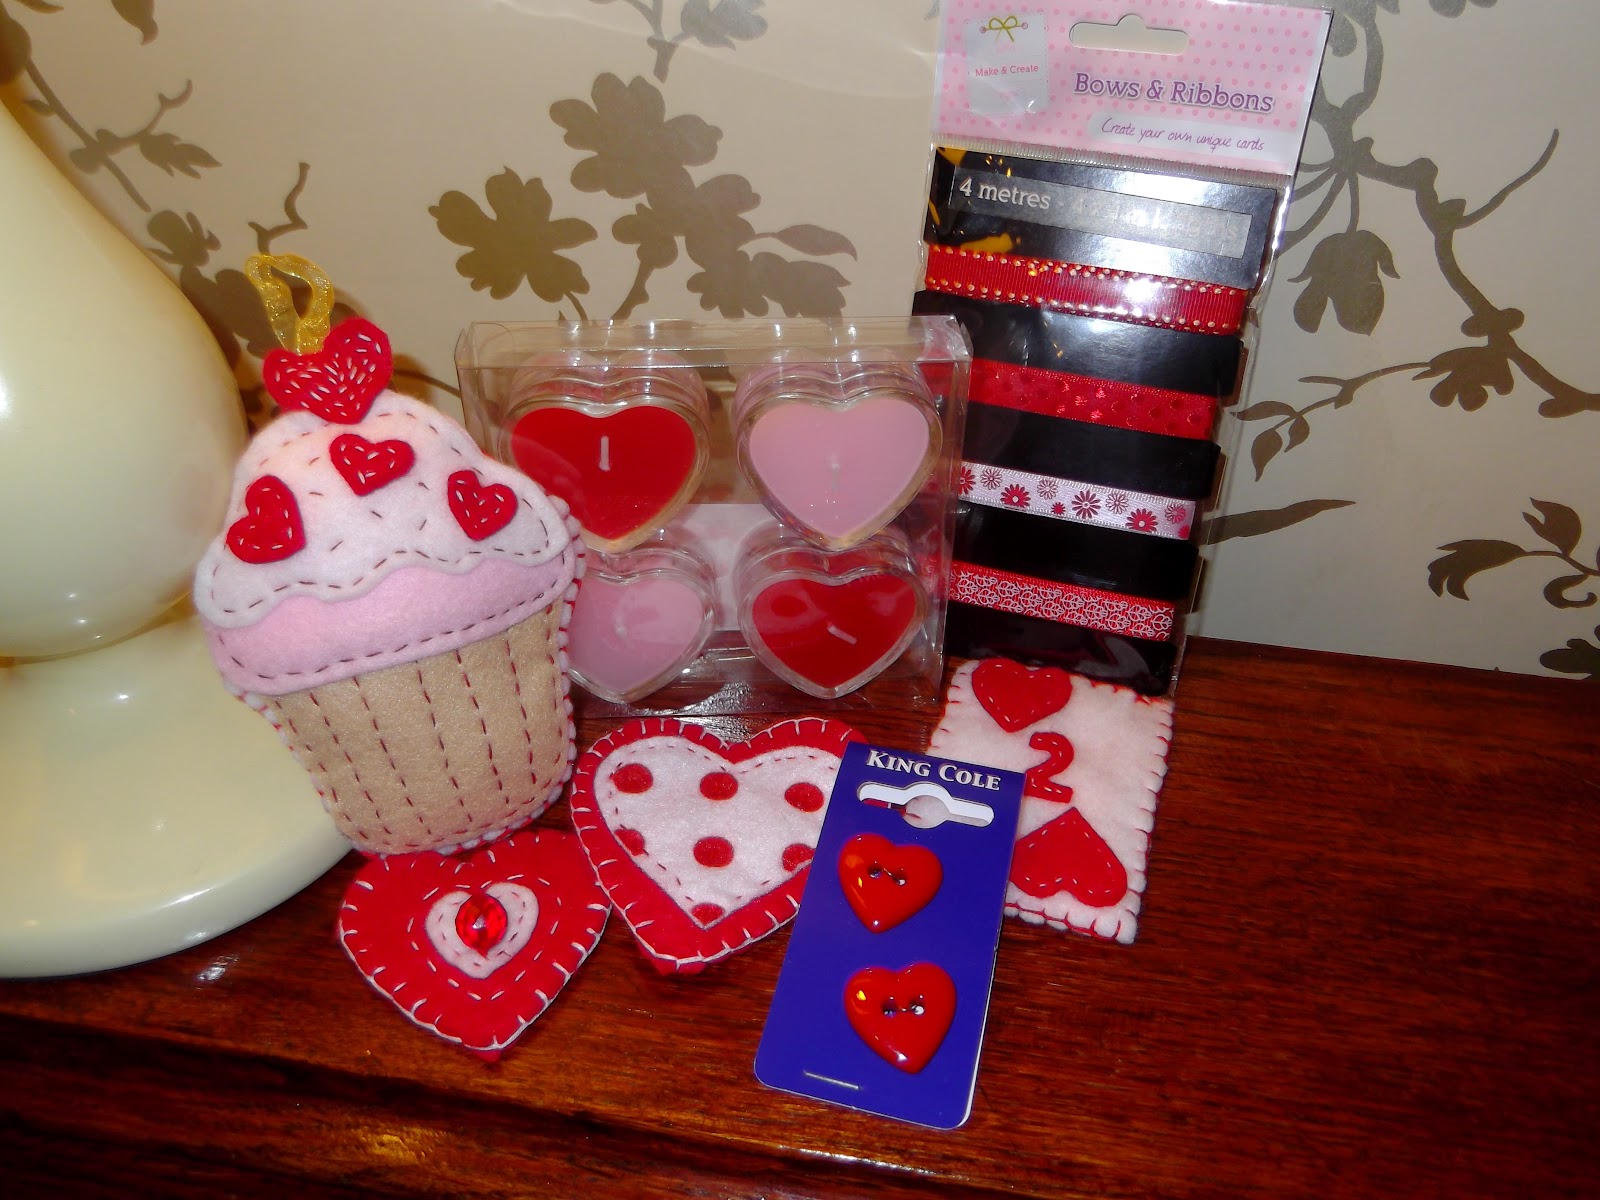
For the swap I made three heart themed magnets out of felt (and I even manged to find cool heart shaped backing magnets), and a cupcake hanger with hearts as the sprinkles!


Following the swap rules I also sent my £3 gift which consisted of some heart buttons, red ribbons and some heart shaped tealights.


I'm looking forward to seeing what LeeAnn has made for me and I'll let you all know what I get!

Monday, 20 February 2012

Felt cupcake decoration

I made this for my friend over at BeautyU’s birthday the other week. She’s a big fan of baking and pretty things so thought this would be perfect!

You’ll need

·         Felt
·         Stuffing
·         Needle and thread
·         Scissors
·         Beads and trimming

Step 1

Draw a cupcake shape onto a piece of paper to use as a template.


Use 2 bits of paper and fold in half and cut out the template. This gives you four pieces the same size (although I only needed 3 in the end)!


Step 2

Take each paper cupcake template and cut into the “layers”.

So I’ve got…

1 – front and back
2 – bun case and cake
3 – icing and cherry!


Step 3

Use the templates to cut the correct size out of felt. (apologies for my hand shadows...stupid spotlights)!


Step 4

Check all your pieces fit together


Step 5

Using a simple running stitch sew all the pieces together, using the stitch to add the detail.


Step 6

Add extra detail. So I added some of my bargain trimming and beads to look like sprinkles!


Step 7

Use a blanket stitch to sew the front and back together, then add the stuffing and sew up and knot! I also added the hanger at this stage so the loose ends were sewn neatly inside.


Step 8

Hang up and admire!!


Saturday, 14 January 2012

10 minute make - Felt bows

These great little bows are really quick and easy to make and they can be used for all sorts of different things!

All you need is:

  • Felt
  • Needle
  • Thread
  • Scissors
  • Measuring tape

Step 1

Measure two strips of felt.

The first 15cm x2cm (this makes the bow loops), the second 10cmx2cm (this is the base of the bow). You can obviously make bigger or smaller depending on how you’ll be using your bow!


Step 2

Cut two little triangles out of the shorter bit of felt to finish the base.


Step 3

Fold the longer bit into a loop and stitch together.


Step 4

Place the loop onto the base of the bow and press down.


Step 5

Now you need to stitch the top to the bottom and make the bow shape.

Turn the bow over then you only need to stitch the edges. So stitch one side, then straight over to the other side. Don’t stitch the middle.

The whole reason you only stitch the sides is that once you’ve done the first stitch on one side you can pull the thread tight and stitch to the other side.

This is what gives the “pinched” bow shape. Stitch the pinched fold a few times to secure then knot!


Step 6

Use for whatever you like!

Maybe a hair grip, magnet, or to decorate gifts!

I used mine on a card for my cousin who has just had a baby girl!


Sunday, 18 December 2011

Felt heart Christmas garland

Christmas is just around the corner and even though my house is starting to look a little like Christmas threw up over it I couldn’t resist one more decoration!

This cute felt heart garland is quick and easy to make and finishes off my mantel piece perfectly!

What you need

·         Felt
·         Templates (I used  my trusty cookie cutters)
·         Glue
·         Ribbon
·         Thread
·         Scissors
·         Needle

Step 1

Cut out a selection of different sized hearts.

I decided to cut out the centre of one of the hearts to make my focal point in the middle of the garland. To do this you just need to fold a heart in half and cut out a smaller half heart shape.


I also stuck some smaller shaped hearts in the middle of bigger ones to add a bit of dimension as they say!

Step 2

Once you’ve cut and stuck all your hearts lay them out and decide on your garland pattern.

Step 3

Once you’re happy with your order stitch the hearts together and secure with a knot.


Step 4

Stitch a ribbon either end of your garland to hang up.

Step 5

Hang up and admire!


Wednesday, 7 December 2011

Felt Christmas decorations

These little felt hearts are quick and easy to make and are much cheaper to make than the ones you see in shops!

The great thing is you can use felt and decorations that match your colour scheme. So if you’re struggling to find that perfect matching decoration, you can make it instead!

What you need

  • Felt
  • Templates (I used cookie cutters)
  • Thread
  • Stuffing (I used cotton wool from poundland)
  • Things to decorate your heart with
  • Needle
  • Scissors


Step 1

Draw around your template to create the front and back of the decoration and cut out.


Step 2

For this decoration I wanted a smaller heart on the front so I used a smaller template to cut out a heart in a different colour.

Step 3

Stitch on any decorations before sewing any parts together together.


I love the buttons I’ve used as they remind me of candy canes! They’re a Fabric Land find!
You could also use bows, ribbons or just stitch patterns on the front.

Step 4

Now stitch the front and back together.


Step 5

Stop when you get to the top so you have a gap for your stuffing, then stuff and stitch up!


Step 6

Add a ribbon for hanging. This is just stitched on.


Step 7

Hang on your tree!

These are a few of the other patterns and styles I’ve done. You could of course do any shape you want!