Monday 24 September 2012

My first competitive bake off!

I’m an avid watcher of programmes like the Great British Bake off and the Ace of Cakes so when I saw that my local food festival was holding a “bake off” I had to enter it!

The theme was Salisbury...which is the city where the food festival is held! I decided to do my cake themed on the local charter market which has been going since 1227!

I started making all the decorations on Wednesday evening and finished the cake on Saturday ready to take along for the festival on the Sunday.

All the decorations were made out of Renshaw’s Sugar and Flower paste. I just bought the white one and coloured it with the Sugarflare pastes. I love the pastes, they give such a vibrant colour and never make the icing sticky.
 
Here are the selection of decorations I made! I warn you, I took a LOT of pics! If you want to know how I made any specific item, leave me a comment and I'll let you know!


I made two cakes - both were Madeira cakes as it’s a firmer cake, able to take the pressure of the millions of decorations I made!

I flavoured one with lemon (which is apparently the tradition flavouring). This was to become my fruit and veg stall. And the other I actually made a flavour discovery breakthrough!

As the second stall was going to be the “bakers” stall, I wanted to do something nice and sweet so I thought chocolate. As well as using cocoa to make the chocolate flavour though I added a tablespoon of Whittards dark chocolate and Raspberry cocoa drink. The flavour worked SO well and came through nice and strong. I’m going to experiment a bit more with their hot chocolates and see what else I can use!


I then used buttercream icing to give the cakes a “crumb coat” before covering with fondant. This just makes it a bit easier to ice as it’s a smoother surface and it helps the fondant stick too!


Then the really fun part was seeing everything come together.


I managed to find a box big enough to transport the cake to the guildhall. I actually started to have nightmares on the Wednesday night about getting the cake to the venue in one piece, or without tripping over (I’m pretty clumsy and tend to trip over my own feet a lot)!
 
 
Well luckily I didn’t trip and made it to the Guildhall in one piece, and had to do some of the finishing touches, like add the canopies. I’ve never known myself to shake so much! I really don’t know how the contestants on the GBBO do it!

There was a children’s category and an adult category, and it’s with great pleasure that I can let you know that I won! Yay! My first ever bake off was a success! It’s at this point that I have to let you into the secret that there were only a couple of entries (which I still can’t believe)! But, a win is still a win, and I had so much fun making the cake and decorations!


I won a great goody bag from a local cook shop called dinghams. The best thing in the goody bag – a pineapple peeler! I’ve always wanted one of these and it’s the most amazing gadget ever! I urge you to buy one!


Sunday 26 August 2012

Egg free chocolate chip cookies


I've been recovering from an op  recently so haven't been able to bake or craft as much as I'd like to. It has been driving me bonkers!
 
Luckily I'm on the mend now and I fancied doing a spot of baking today.
 
Unfortunately, being refined to the house for a few weeks has meant a lack of ingredients! Even eggs!
 
Luckily I had a few basics so thought I try an eggless cookie recipe and they worked out great! The texture is quite chewy but I'm a big fan of that! They don't brown as much as normal cookies either, but I doubt they'll hang around long enough for anyone to care!
 
Ingredients
 
2 & 1/4 cups - Plain flour
1/2 cup - softened butter
3/4 cup - Caster sugar
1 tsp - Vanilla essence or flavour
1/2 cup Oil (I used sunflower)
1 tsp Baking powder
3 tsp Water
1/2 to 1 cup of Chocolate chips (although I used peantut butter chips for mine, mmmm)!
 
Basically cream the sugar and butter together, then add everything else!
 
Bake for about 12 - 15 minutes at 190 deg and enjoy!


Saturday 2 June 2012

10 minute make - Quick Jubilee Bunting

I don't know why, but I'm a right last minute Larry when it comes to buying decorations for events such as the Jubilee.

Bunting has been in shops since, well, probably January but I've always thought "I'll save my money and get it a bit closer to the event".

I never seem to learn though - IT WON'T BE THERE CLOSER TO THE EVENT!

So, when I went to try and find some bunting to put in my window last week, surprise surprise everyone had soldeout! 

I didn't really have time to whip out my sewing machine either to make some which I would have like to have done. 

I ended up buying some union flag napkins as we're going to a jubilee picnic and I thought it would make perfect bunting too! (These were from M&S and were £1.50).

How to make 10 minute Jubilee Bunting

Take a napkin and open  it out. If you can't find union flag bunting then why not get red, white and blue? Or, just white and get people to decorate them for a really personalised party!


Cut the napkin in half and put Ribbon in the crease and tape or staple to the napkin. Then fold back over.


Continue with as many napkins as you want on your bunting and hang up!


Now, obviously, this bunting COULD be used outside, if the rain stays away...but we all know what good ol' Britain is like around bank holidays! So, indoors it is then!

Saturday 19 May 2012

Harry Potter party!

So the last few weeks have been a bit crazy! I seem to have been here there and everywhere! One of the places I was lucky enough to visit over the last few weeks was the new Warner Brothers Studio Tour – The Making of HarryPotter.

I’m a massive Harry Potter fan, I’ve read all the books, watched the films, been lucky enough to visit the Wizarding World in Orlando and have just signed up to Pottermore! However the one thing that I had yet to do was have, or go to a Harry Potter party – what’s up with!

Well luckily this situation has now been rectified! A couple of my friends I work with who tweet over @Stace15  and @princessjrogers are also huge Harry Potter fans so a HP party was planned!

Stacey and Jess are both going to the tour in the next few month and Stacey decided to host the party before we all went (we’ll obviously have to have another once we’ve all been)! We drank Butterbeer, looked at Harry Potter photos and ate Polyjuice potion and pumpkin pasties! And well, all I can say is I feel every night should be Harry Potter night!

For the evening I made Cauldron Cakes which I saw on sale at the Wizarding World. I was really pleased with them and I’ll post a recipe and tutorial as my next post!

For now though, here are the pictures from the Harry Potter party! Hopefully they’ll inspire you to have your own HP party!


The polyjuice potion was scrummy butternut soup squash! Mmmm!

Mmm, hot pumpkin pastys coming out of the oven! Must remember to ask Jess for this recipe!

Bertie botts every flavour beans!

My Cauldron cakes!

YUM!

Saturday 21 April 2012

Trying out my new camera

I'm really not sure where this year seems to be going! I really seem to have neglected the blog recently!

Well, to make up for that I thought I'd post a few pics from my day out today to Lacock Abbey in Wiltshire.

I've always been interested in photography but never really had a great camera to try out some fancy shots.

We've now invested in a new bridge camera - a Panasonic Lumix FZ100. I've still to figure out everything it can do but here are some of my favourite pics of the day!

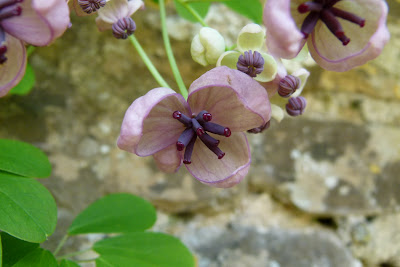
A few florals...

Bzzzzz!!

Was trying to get the rain drops on this one!


Hopefully on the top pic you can see the little white flower blurry in the foreground, then it up close on the bottom pic!


It's all about the framing!

Pictures in low light had always been tricky for me but I was so pleased with the way this turned out. It's actually a spinning lamp in the house part of the Abbey that projected dancing figures onto the wall! Very cool!

Now, I'm a massive fan of Harry Potter and they filmed quite a lot of the Philosophers Stone and the Chamber of Secrets on location here so you might recognise some of the next shots!

The cloisters at the Abbey are used in quite a few of the external shots at Hogwarts.

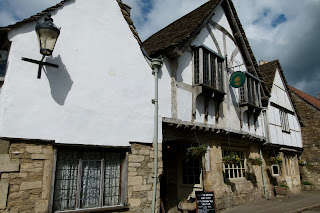
This pub is actually featured in the Half Blood Prince. Harry and Dumbledore walk past it on the way to...


Professor Slughorn's house!

I hope you like my first attempt at some fancy photos! And even if you aren't a fan of Harry Potter the village of Lacock is a beautiful area to visit! Plenty of little craft shops and tea shops! You can find out more about the area on the National Trust website.
Wednesday 4 April 2012

10 minute make - Easy Easter display

Easter is coming up so I wanted to do a quick and easy display to brighten up my dining room table.

I used some yellow Laburnum from my neighbours garden as I thought it was so pretty (don’t worry, I did ask first before chopping up her tree)!


You could use any branches though to get the same effect.


Then I made up two little vases of Daffs. I used jam jars for the vases.

I wrapped sisal round the stems of the daffs to add a little texture. You can buy this online or in a florist wholesaler.


I then tied a raffia bow around the jar.


Then I decorated the branches with little hanging eggs. I bought these a few years ago but I have seen similar in poundland or the Works!

I then used a bit more sisal as on the table to look like grass!


Tuesday 20 March 2012

Felt needle case

This is how to make the needle case I made for my first craft swap with Popular Crafts magazine. You can read more about what I sent for the swap and what I received here!

Step 1

Cut out a template for the main part of your needle case. I made mine about 18cm by 10cm but you can do whatever size you want.


Step 2

Cut out 2 bits of felt using your template. I used contrasting colours. I also decided to round the edges but I didn't take a picture of that!


Step 3

I wanted to add a little pocket on the inside. To do this cut a little rectangle of felt. Stitch the pocket to the inside piece of felt only! It’s important to do this before sewing the front and back together as it hides the stitches.


Step 4

Create what you want to go on top. I made an owl for mine as the theme for the swap was owls!


Step 5

Stitch your owl (or whatever you've made) to the outside piece of felt. I also added to little buttons that you can see just peeking in on the edge of the photo!


Step 6

Cut a smaller piece of felt to make your page to put your needles and pins on. Stitch to the middle of the inside piece of felt.


Step 7

Once all the inside and outside decorations and pages have been secured sew the inside and outside felt together using a blanket stitch.


Step 8

Add your needles, pins and buttons! (As you can see I also decided to add a couple of buttons to the front)!