Sunday, 18 December 2011

Felt heart Christmas garland

Christmas is just around the corner and even though my house is starting to look a little like Christmas threw up over it I couldn’t resist one more decoration!

This cute felt heart garland is quick and easy to make and finishes off my mantel piece perfectly!

What you need

·         Felt
·         Templates (I used  my trusty cookie cutters)
·         Glue
·         Ribbon
·         Thread
·         Scissors
·         Needle

Step 1

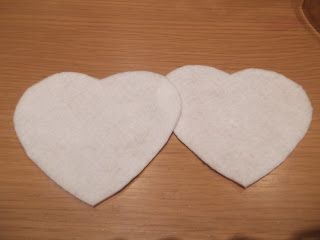
Cut out a selection of different sized hearts.

I decided to cut out the centre of one of the hearts to make my focal point in the middle of the garland. To do this you just need to fold a heart in half and cut out a smaller half heart shape.


I also stuck some smaller shaped hearts in the middle of bigger ones to add a bit of dimension as they say!

Step 2

Once you’ve cut and stuck all your hearts lay them out and decide on your garland pattern.

Step 3

Once you’re happy with your order stitch the hearts together and secure with a knot.


Step 4

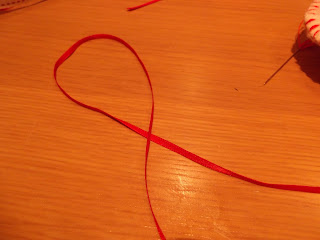
Stitch a ribbon either end of your garland to hang up.

Step 5

Hang up and admire!


Wednesday, 7 December 2011

Felt Christmas decorations

These little felt hearts are quick and easy to make and are much cheaper to make than the ones you see in shops!

The great thing is you can use felt and decorations that match your colour scheme. So if you’re struggling to find that perfect matching decoration, you can make it instead!

What you need

  • Felt
  • Templates (I used cookie cutters)
  • Thread
  • Stuffing (I used cotton wool from poundland)
  • Things to decorate your heart with
  • Needle
  • Scissors


Step 1

Draw around your template to create the front and back of the decoration and cut out.


Step 2

For this decoration I wanted a smaller heart on the front so I used a smaller template to cut out a heart in a different colour.

Step 3

Stitch on any decorations before sewing any parts together together.


I love the buttons I’ve used as they remind me of candy canes! They’re a Fabric Land find!
You could also use bows, ribbons or just stitch patterns on the front.

Step 4

Now stitch the front and back together.


Step 5

Stop when you get to the top so you have a gap for your stuffing, then stuff and stitch up!


Step 6

Add a ribbon for hanging. This is just stitched on.


Step 7

Hang on your tree!

These are a few of the other patterns and styles I’ve done. You could of course do any shape you want!


Tuesday, 6 December 2011

Made by (A)me weekly round up - W/C 28.11.2011

The tree is up, the lights are shining, and my belly is full of Christmas food! I can't believe how quickly CHristmas is creeping up on me! I did manage to finish my Christmas decorations, so here's a round up of last week! 

Make a Christmas pine cone wreate for less than £5
Quick and easy personalised stockings
Baking the Christmas cake part 2 - easy way to line a tin

Sunday, 4 December 2011

Baking the Christmas cake!

Last weekend, after the fruit soaked for a WEEK in sherry it was time to mix all the other ingredients together and embark on the 4 hour bake of the Christmas cake.

This is my first Christmas cake and I was worried about lining the tin, but I used the tips in the great british bake off book and they really did make life easier!

Step 1
Draw around the base of your tin to cut out a circle to line the bottom


Step 2
Cut a length of baking parchment and then cut flaps in the edge about an inch long, then fold up.


Step 3
Grease your baking tin and then put your circle in the bottom, then add the edge. Where you've cut the flaps it makes it so much easier to line the edge!


Step 4
Add your cake mix and bake! You can find the recipe I used in part one of my Cake making adventure!

Here is my finished cake! I think it's a little dark but I did take a bit out of the bottom and it does taste ok! So, fingers crossed when it's decorated and fed with brandy, no one can taste the burnt bits!!